How to Master Savory Lye Chestnuts at Home
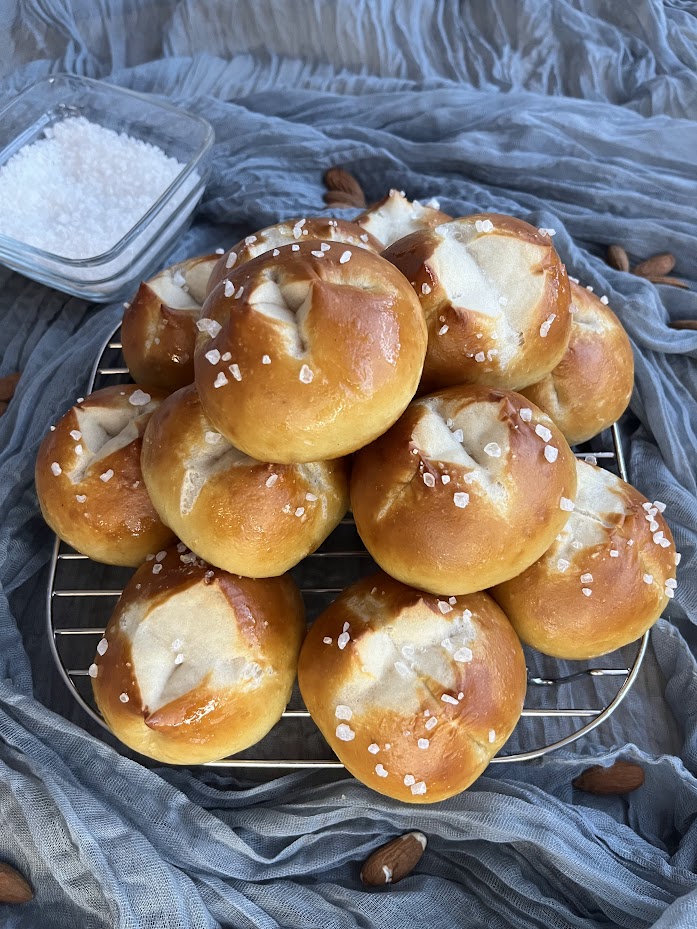
Discover the unique joy of traditional alkaline baking with these delightful Lye Chestnuts. Featuring a beautifully deep brown, slightly chewy exterior and a tender, soft crumb, they deliver that signature pretzel flavor in a charming new shape. They are the ultimate savory snack for any occasion, especially when served with a cold drink and rich Savory Pork Crackling Buns!

The Magic of Lye Chestnuts
Welcome to a truly special baking adventure! There is something incredibly rewarding about traditional, honest craftsmanship. Lye pastry has an unforgettable, deep flavor, a gorgeously rich mahogany crust, and a wonderfully dense crumb. While working with lye requires a little bit of respect and care, the magical result is absolutely worth your time.This recipe yields 14 beautiful pieces. I have broken down the process into simple, gentle steps so you can bake with confidence and joy.
Ingredients
Method
- Creating the Omládek (Preferment): Begin by gently mixing your water and yeast together first, and only then stir in the flour. Cover it up and let it rest until it doubles in size, until distinct bubbles form on the surface. This cozy resting period usually takes about 30 to 45 minutes, depending on the conditions, especially the temperature in your kitchen.
- Mixing the Main Dough: To your bubbly omládek, add the water, flour, sugar, and grated cheese, mixing them together roughly. A little baker’s secret: Always wait to add your salt and cold, cubed lard until after these initial ingredients are thoroughly combined.
- Kneading with Patience: Knead the dough until it naturally pulls away from the sides of the bowl. Take a deep breath and be patient—do not add extra flour right away. You are looking for a beautifully smooth and elastic texture.
- The Main Fermentation: Let your dough rest and rise until it has doubled in volume, which typically takes an hour to an hour and a half. Remember to watch the dough’s volume increase, not the clock, as the proofing time depends heavily on the temperature and fat content.
- Dividing and Shaping: Turn your beautifully risen dough onto your workspace and divide it into exactly 50g pieces (this will give you 14 pieces). Gently shape each piece into a neat little bun resembling a chestnut.
- Proofing and Chilling: Transfer your shaped chestnuts onto a baking tray lined with a floured kitchen towel. Let them proof beautifully outside at room temperature for about 30 minutes first. Once they have rested, move the tray to the fridge for another 30 minutes. The dough will firm up, making it much safer and easier to handle in the lye bath.
- The Lye Bath: Put on your gloves and protective goggles. Measure 500g of cold water into a bowl and carefully sprinkle in 15g of hydroxide. Stir with a stainless steel whisk until the pearls are dissolved. Carefully dip the chilled chestnuts into the bath (for about 4–5 seconds), lift them out with a slotted stainless steel spoon, let them drip off, and transfer them to the baking tray.
- Finishing and Baking to Perfection: Make sure your baking tray is lined with parchment paper that you have thoroughly brushed with oil beforehand. (If you skip the oil, the lye would eat through the paper without oil and the pastry would stick!) Right before baking, lightly cut a cross on the top of each chestnut and sprinkle with coarse salt. Bake in an oven preheated to 220 °C for 12–15 minutes, until they develop a rich, dark chestnut color. Enjoy the magic you’ve just created!
Notes
⚠️ A Gentle But Important Safety Warning (NaOH) Working with food-grade sodium hydroxide (lye) requires your full attention, as it is a strong, corrosive substance. Please follow these simple rules for safe and joyful baking:
- The Golden Rule: Always carefully pour the hydroxide into the water, NEVER pour water over the hydroxide! Doing it the wrong way could cause a sudden, explosive reaction.
- Please wear protective goggles and rubber gloves to protect your skin and eyes.
- Ensure your kitchen is well-ventilated while you prepare the bath.
- Only use stainless steel, glass, or high-quality plastic bowls for your bath. Never use aluminum cookware.
- Busy Baker’s Alternative: You can skip making the preferment entirely! Just mix all the ingredients according to the rules above, and let the dough cold-proof in your fridge overnight.
- Parchment Paper Prep: Always thoroughly brush your parchment paper with oil before placing the lye-dipped dough on it. Without oil, the lye will eat through the paper and the pastry will stick!
Enjoyed this baking deep-dive? Join our Bakeklubb for monthly artisan baking notes and early access to upcoming workshops.