The Key to Bakery-Style Homemade Toast Bread
Say goodbye to store-bought loaves forever with this perfectly soft and sliceable homemade Toast Bread. It boasts a beautiful golden crust and a tender, milky crumb that makes the ultimate sandwich or morning toast. By incorporating a gentle omládek (preferment), the bread achieves exceptional softness and a longer shelf life. If you’re ready for a bigger sourdough challenge next, try our rustic 100% Rye Sourdough Bread.
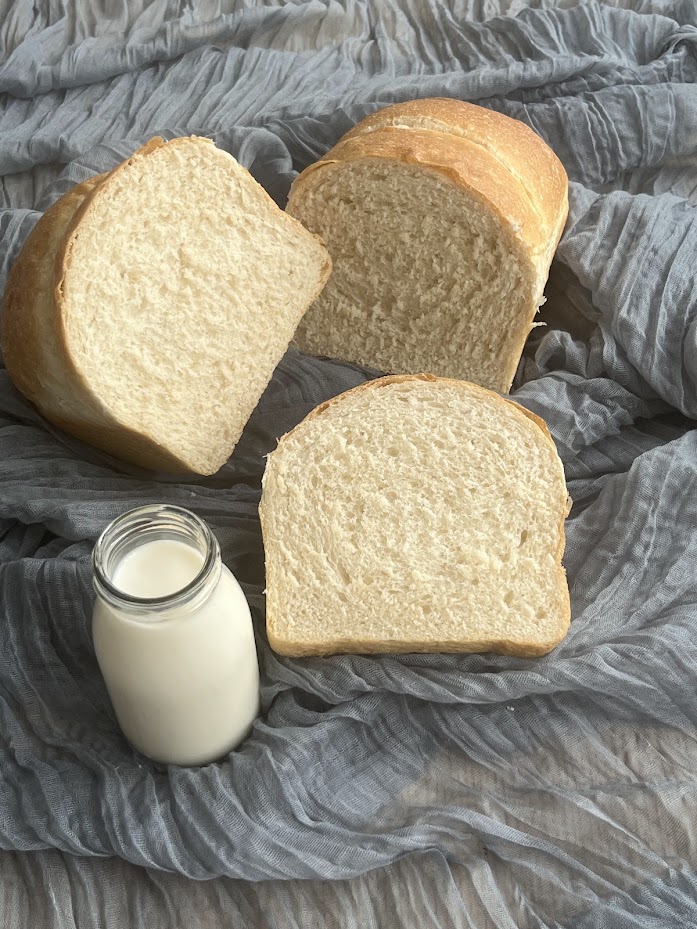

Toast Bread
Welcome to Artisan Baking: Welcome to a space where honest ingredients meet home-made magic. Today, we are putting commercial supermarket bread aside to bake a true artisan toast bread. By utilizing a traditional preferment (omládek) and the richness of buttermilk, this loaf achieves an incredibly soft, shreddable crumb and a deep flavor that will transform your morning toast forever.Baking History Fact (The Railway Connection): Have you ever wondered why toast bread is often baked in a rectangular pan to get that perfect square shape? While European bakers used lidded square tins as early as the 18th century, this style became globally iconic thanks to the railway pioneer George Pullman in the 19th century. Pullman chose square loaves for his train dining cars because they maximized tight storage space – three square loaves fit into the exact same space as two round ones!
Ingredients
Method
- Creating the Omládek (Preferment): When mixing the omládek, always combine the water with the fresh yeast first, and only then stir in the flour. Mix it until smooth, cover it, and let it rest. You want it to double in volume and develop distinct bubbles on the surface. This typically takes 30 to 45 minutes, depending on the temperature of your kitchen.
- Mixing the Main Dough: Combine your bubbly omládek with the plain flour, buttermilk, and sugar. Mix these ingredients thoroughly until a rough dough forms. Remember our golden rule: any fat (the oil and the cold, cubed butter) and the salt must be incorporated into the dough only after these initial ingredients are beautifully combined.
- Kneading with Patience: Knead the dough until it is completely smooth, highly elastic, and naturally pulls away from the sides of the bowl. Patience is absolutely essential here; please do not add extra flour right away, just let the gluten develop properly.
- The Main Fermentation: Cover your dough and let it rise until it doubles in volume. This usually takes 1 to 1.5 hours, but remember that the crucial factor is always the visible increase in volume, not the time on the clock.
- Shaping the Bread: Once the dough has doubled, turn it out onto your workspace and divide it into 3 equal portions. Shape each portion into a tight, firm roll. Place the 3 shaped dough pieces side-by-side into a loaf pan that has been thoroughly greased with butter.
- Final Proofing: Cover the pan gently and let the dough undergo its final proof at room temperature until the bread rises beautifully and fills the pan.
- Baking with Steam: Preheat your oven to 220 °C and prepare for steam baking by placing an empty roasting pan on the bottom floor of the oven. Right as you slide your bread pan into the oven, carefully pour boiling water into the bottom roasting pan and quickly close the door. Immediately lower the oven temperature to 180 °C.
- Finishing the Bake: Bake with steam for the first 10 minutes. After 10 minutes, open the door to release the steam, carefully remove the water pan Bake for another 20 minutes without steam until the bread is perfectly baked through (Check the bread after 10 minutes and cover it with aluminum foil if necessary).Remove from the pan immediately and let it cool completely on a wire rack before slicing.
Notes
Baker’s Secret (The Overnight Breakfast Bread): If you want fresh toast bread ready right for breakfast, you can easily adapt the process for cold overnight proofing in the refrigerator. Choose one of these 3 practical methods depending on your morning schedule:
• Cold Fermentation of the Dough (Bulk Cold Proof): Skip making the omládek entirely. Mix all ingredients together at once, but reduce the fresh yeast to exactly 5 g. Cover the dough and place it directly into the refrigerator overnight. In the morning, turn out the chilled dough, shape it into 3 equal portions, place them side-by-side into the greased pan, and let it undergo its final rise at room temperature until doubled in volume before baking.
• Cold Proofing of the Shaped Loaf (Final Cold Proof): Prepare the omládek, but reduce the fresh yeast to 5 g (note that the preferment and dough fermentation will take a little longer than usual due to the smaller quantity of yeast). Proceed with mixing and kneading the main dough and let it undergo its main fermentation. Immediately after shaping the dough into 3 equal pieces and placing them into the greased loaf pan, cover tightly with oiled plastic wrap and place directly into the refrigerator overnight to undergo its final rise until it doubles in volume.
• Double Cold Proofing (Dough and Shaped Loaf): Reduce the fresh yeast to 5 g and skip the omládek entirely, mixing all ingredients together at once. Cover the dough and place it into the refrigerator overnight. The next day, shape the chilled dough into 3 equal pieces, place them into the greased pan, cover tightly with oiled plastic wrap, and return the pan to the refrigerator for a second cold rise until it doubles in volume.
Baking Chemistry Fact (The Power of Buttermilk): Instead of regular milk or water, this recipe relies heavily on buttermilk. The natural lactic acid in buttermilk breaks down the long gluten strands just enough to create an incredibly tender, soft crumb, while also giving the yeast an ideal acidic environment to thrive in.
Enjoyed this baking deep-dive? Join our Bakeklubb for monthly artisan baking notes and early access to upcoming workshops.